Extensions in Azure Devops can be either Public or Private. let us see how to publish and add a private extension to the organization in Azure DevOps
Before Publishing an extension, you need to have a PublisherID in Market Place and you can see how to create a Publisher ID in Visual Studio Market Place
And then you can see how to create a Private Extension for Azure DevOps
Now let us see how to install Private Extension for any Azure DevOps Organization
Step 1: Go to Visual Studio Market Place
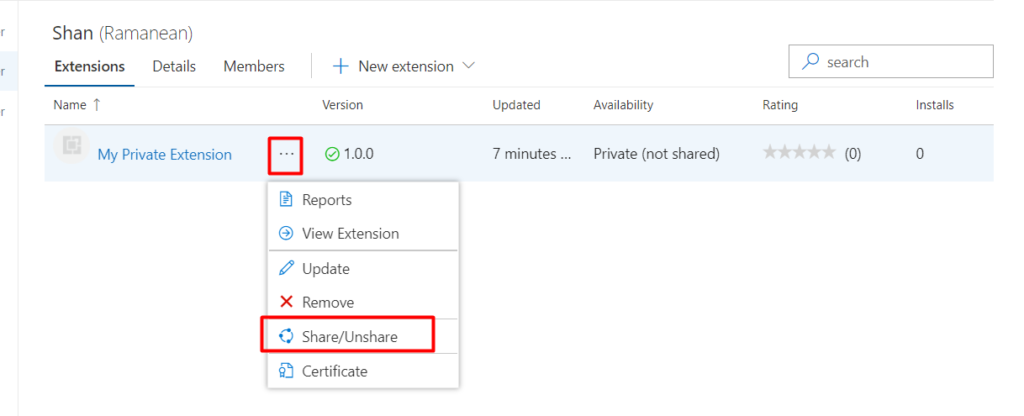
Step 2: And in the extension you are planning to “Share”, Click on the 3 dots next to the Extension and then Click on “Share/UnShare”

Step 3: In the next page, Click on the Organization

Step 4: Enter the Azure DevOps Organization you want to share

Step 5: After you have shared you extension, you can see a small detail saying the extension is shared with an organization and if you have shared with 10 organization then it will be visible as “Shared with 10”

Step 6: After sharing, now go to the organization with which you have shared the extension
Step 7: Then click on “Manage Extensions”

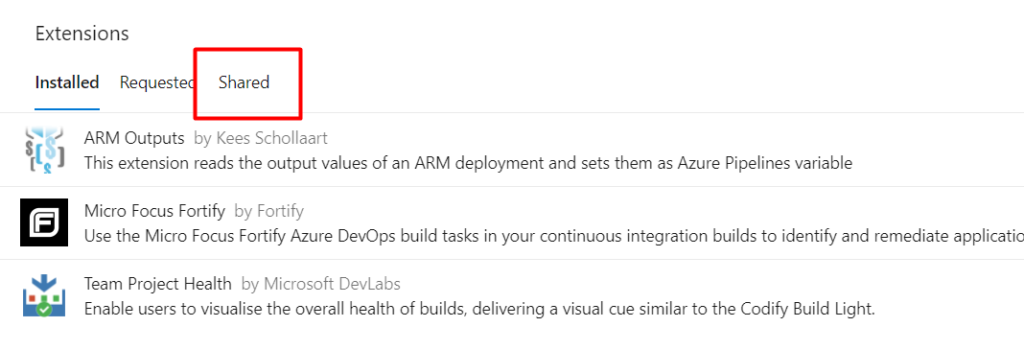
Step 8: Then click on the Shared in the next page, you will be able to see the list of extensions “Shared”


Step 9: Then Click on the “Private Extension”
Step 10: And then click on “Install”

Step 11: Again click on “Install”

Step 12: After the extension is installed, Go to the Organization you will be able to see the menu

Step 13: Click on “My Private Hub”
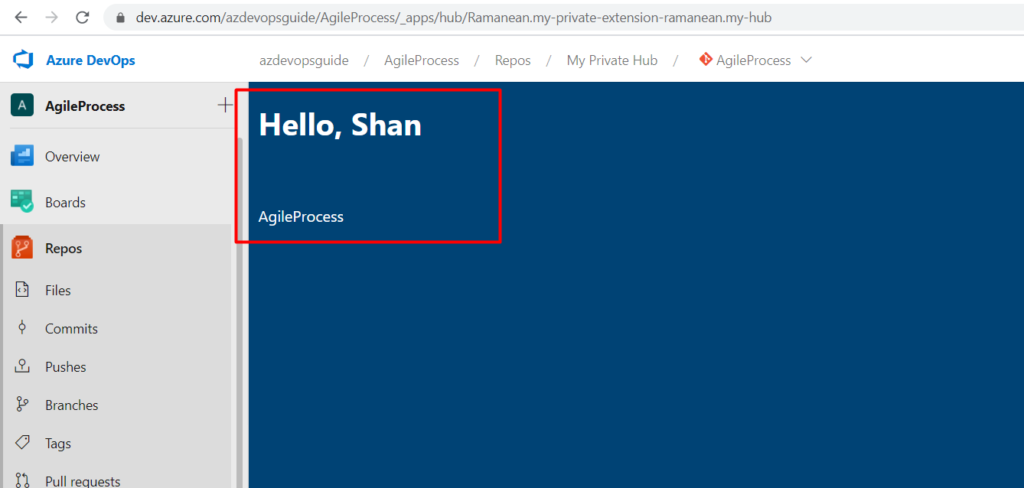
Step 14: The Extension page whatever we have created would be visible as shown below with the username and project name

This is how you can install a Private Extension in Azure DevOps