Workitems can be moved between different projects in Azure DevOps. Except TestCases, almost all other workitems like Epic, Feature, UserStory, PBI, Bug, Issue, Task can moved from one project to another with a click of a button.We can move the workitems to different project via Backlogs or by queries. Let us how to do it in both ways in the below steps..
Step 1: Go to the Azure DevOps Project from where the workitems should be moved
Step 2: Click on Boards –> Backlogs
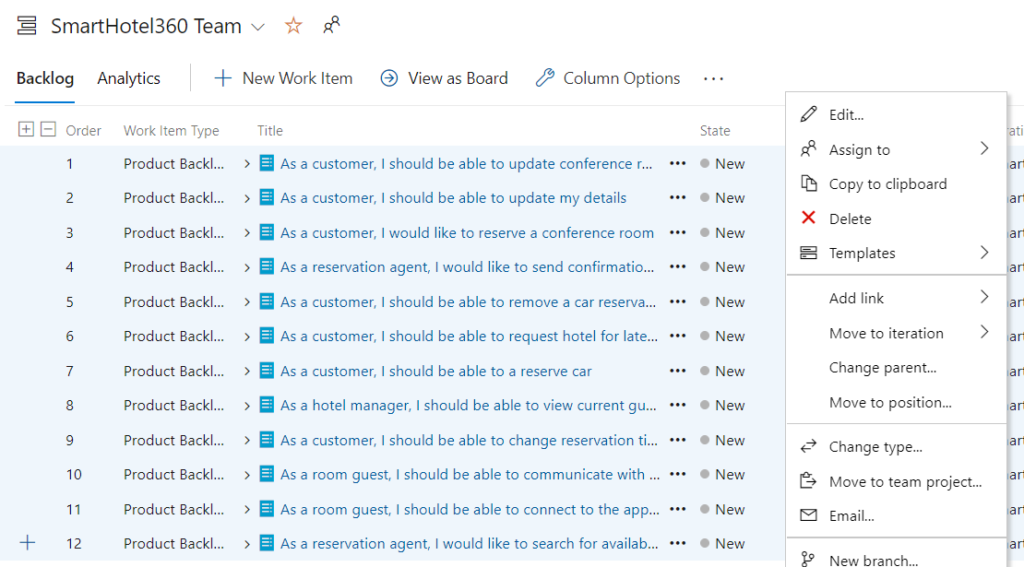
Step 3: Select the workitems to be moved as shown

Step 4: Select “Move to Team Project”.Once selected the Move Workitem popup would be displayed as as shown below. Select the Destination Project, AreaPath, Iteration Path and Current Type of the workitem, then click on “OK” button

Step 5: All the selected workitems would be moved to the new project as soon as the “OK” button is clicked on Move WorkItem popup.
Moving Workitems to another project via Queries: Now let us see about how to move the workitems displayed in queries from one project to another project.
Step 1: Create a query that has the list of the workitems that needs to be moved to another project.
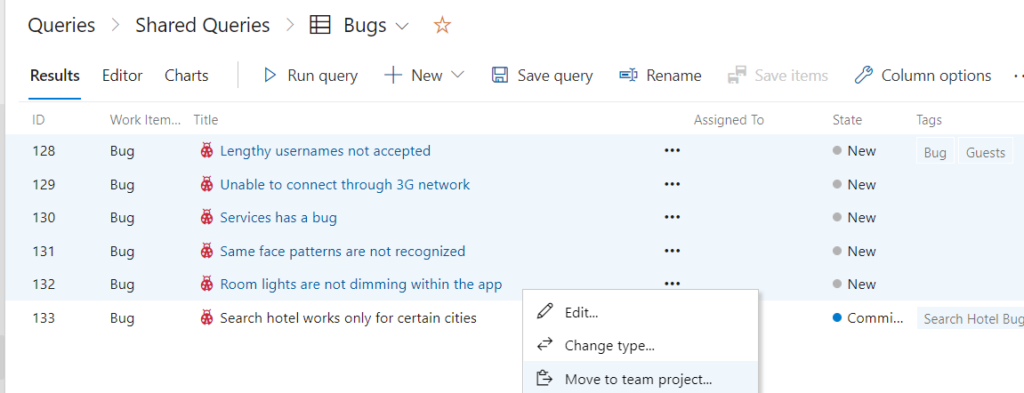
Step 2: Go the created query in Azure DevOps and select the workitems that needs to be moved to another project.
Step 3: Right click on the selected workitems and then click on “Move to Team Project” option as shown below

Step 4: In the next screen, Select the Destination Project, AreaPath, Iteration Path and choose the option “Keep Current Type” and then click on “Ok” button. Incase if you want to add any comments to the workitems that would be moved, that could be added in the given text box below

Step 5: Then click on “Save Items” as shown below

Step 6: Once SaveItems button is clicked, the workitems would be moved to the destination project and they would be no longer visible in the source project as shown below
