To start a virtual machine in Azure which has been created follow the below steps. There are 2 ways which we can start a virtual machine in the Azure portal one is by using the normal portal UI and another one is by using Azure CLI. Let us see the below steps
Step 1: Login into the Azure Portal and from resources select on the machine which you like to start
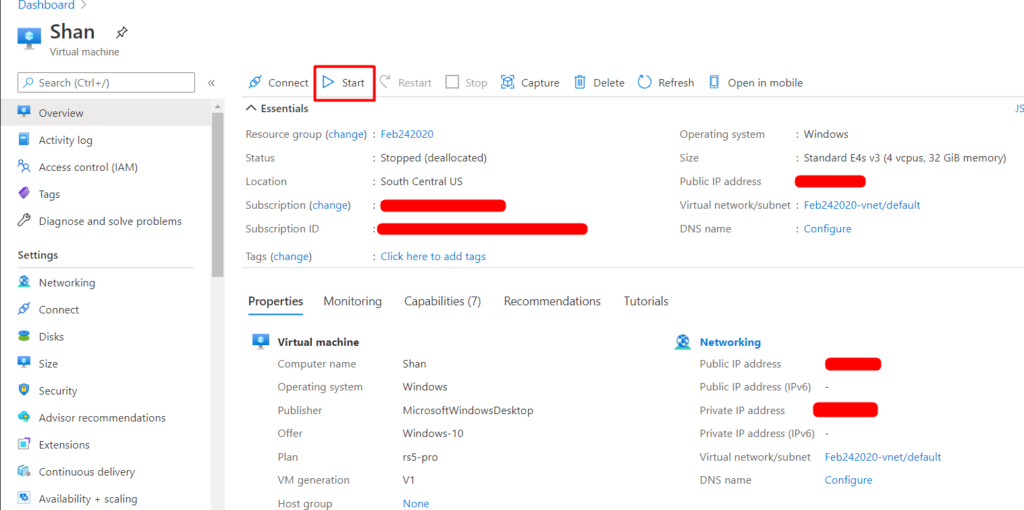
Step 2: Go to the Virtual machine and the details of the Virtual machine will be displayed as follows

Step 3: On the top you will see a start button. Click on the start button to start the virtual machine.
Step 4: Once you start the virtual machine, you will get a notification at the top saying the virtual machine is starting
Step 5:Once it has started you can see the status of machine getting updated as “Running” as shown below

Once the machine is up and running you can connect to the machine using either Remote Desktop or by telnet or putty if it’s a Linux system. You can also connect to a Linux system via RDP after installing a software called “X Launch” remotely on the system.